
The decision to build my own desktop computer stemmed from a confluence of various factors that highlighted the benefits of customizability and cost-effectiveness. In the rapidly evolving world of technology, pre-built systems often fail to meet specific requirements, especially when it comes to performance for gaming and productivity tasks. Building my own computer allowed me to tailor the components to suit my needs precisely, ensuring that I could maximize both functionality and efficiency.
One of the primary advantages of building a computer as opposed to purchasing a pre-built system lies in the economic aspect. Custom-built computers allow for more control over expenditure, enabling the selection of high-quality parts that provide excellent performance without the premium price tag often associated with branded products. This is particularly important for individuals who are looking to optimize their budget while achieving superior specifications. By carefully selecting components such as the processor, graphics card, and memory, I could achieve a significantly higher performance-to-cost ratio.
Moreover, the personalization aspect of building a computer cannot be overstated. I could choose aesthetically pleasing parts that align with my personal style while ensuring that each component harmonized with the others for optimal performance. This customization is something that pre-built systems often do not offer, as they are limited to factory settings and configurations that may not align with an individual’s unique preferences or requirements.
Lastly, the learning experience associated with building a desktop computer is immensely rewarding. Engaging with the assembly process provided me with valuable insights into how computers function, which not only enhanced my technical skills but also deepened my understanding of technology. The combination of cost efficiency, personalization, and the enriching journey of construction ultimately guided my decision to embark on this project of building my own custom desktop computer.
1. Choosing the Right Components
When embarking on the journey of building a custom desktop computer, the selection of components is crucial for achieving the desired performance and functionality. The key components that require careful consideration are the CPU, motherboard, RAM, GPU, storage solutions, power supply, and the case itself. Each element plays a significant role in the overall performance and compatibility of the build.
The CPU, or central processing unit, is often referred to as the brain of the computer. It is essential to choose a processor that not only meets your performance needs but also is compatible with your selected motherboard. Researching the latest CPUs and understanding specifications such as core count, clock speed, and thermal design power (TDP) is vital. Websites like CPU-Z and benchmark databases can be invaluable resources for comparing options.
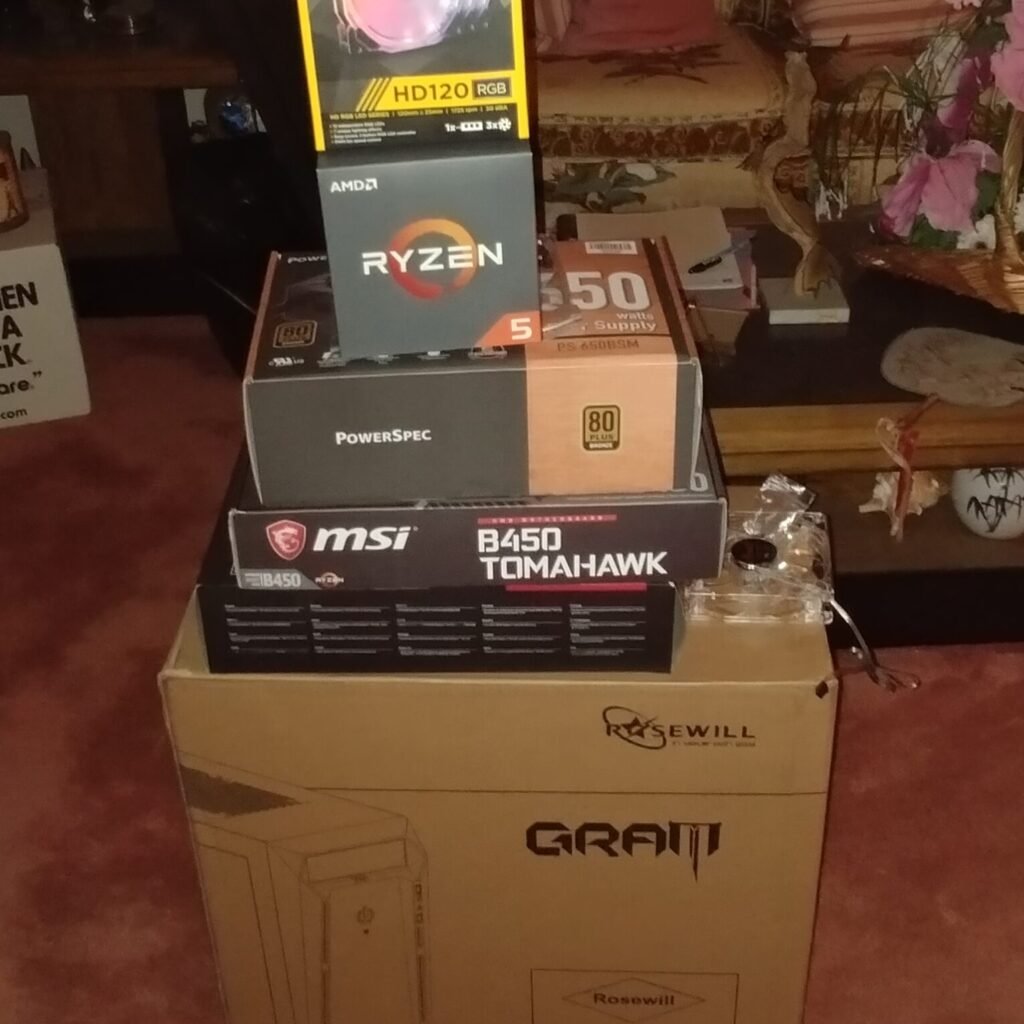
The motherboard serves as the backbone of the build, connecting all components. It is crucial to consider its chipset and compatibility with the CPU as well as its size, which should match the chosen case type (ATX, Micro-ATX, etc.). RAM is another important component; the amount and speed will impact multitasking capabilities and overall system responsiveness. It’s advisable to opt for at least 16GB of RAM for a smooth experience in modern computing tasks.
A Graphics Processing Unit (GPU) is particularly critical for tasks involving rendering or gaming. When selecting a GPU, one should assess the memory allocation, performance benchmarks, and connectivity options. Storage solutions have evolved significantly, with SSDs providing faster read/write speeds compared to traditional hard drives, thus delivering better performance. Finally, a reliable power supply should be chosen based on wattage and efficiency rating to ensure stable and safe operation.
To facilitate this research, online forums, comparative resources, and reviews from reputable tech sites played an essential role in guiding my decisions. By prioritizing compatibility and performance, I was able to assemble a coherent and powerful system, perfectly tailored to my needs.
2. Assembling the Computer: Step-by-Step Guide
Assembling a custom desktop computer can be an engaging and rewarding process. To ensure a smooth assembly, it is crucial to prepare your workspace adequately. Begin by organizing your tools, such as screwdrivers and anti-static wristbands, and lay out all the components, including the motherboard, CPU, RAM, power supply, GPU, and storage devices. A clutter-free workspace will help prevent mishaps and component damage.
Start the assembly by carefully installing the CPU onto the motherboard. Align the CPU in the socket, ensuring you match the notches. Gently lower it into place, closing the lever to secure it. Next, proceed to install the RAM modules. Typically, modern motherboards have four slots, and you should populate them according to the manufacturer’s guidelines to optimize performance. Once the RAM is installed, you will need to fit the motherboard into the computer case, ensuring that standoffs are placed correctly to avoid short circuits.
After securing the motherboard, it’s time to connect the power supply; this is a crucial step in ensuring that all components receive appropriate power. Carefully connect the 24-pin ATX power cable to the motherboard, along with any additional power connectors necessary for the CPU. Following this, install the storage drives, whether they are HDDs or SSDs. Ensure that they are securely mounted in their designated bays, connecting any necessary data cables to the motherboard.
The final component to install is the GPU. Slide the graphics card into the appropriate PCIe slot and secure it with screws to prevent any movement. Double-check all connections, ensuring that everything is secure and appropriately seated. Throughout this process, troubleshooting may become necessary; common issues include loose connections or misfit components. Always follow safety precautions, especially grounding yourself to prevent static electricity damage. With careful attention to detail, your custom desktop assembly will be a success, culminating in the satisfaction of a fully operational machine.
3. First Boot and Initial Setup
As the moment to power on my custom-built desktop computer approached, a mix of excitement and anxiety surged within me. This was the culmination of weeks spent meticulously selecting components, researching compatibility, and assembling parts. With all connections securely in place and the power supply plugged in, I took a deep breath and pressed the power button. The initial whir of the fans and the glowing lights were a miraculous sight, signifying that my efforts were about to pay off.
However, that euphoric moment was quickly overshadowed by a hint of apprehension. I knew that powering on a custom-built computer could sometimes lead to unforeseen issues. Was the motherboard properly connected? Had I applied thermal paste correctly? Fortunately, the system booted smoothly, and I was welcomed by the BIOS interface. Here, I had the essential task of configuring the settings according to my preferences and the specific requirements of my hardware. Adjusting parameters such as boot order and enabling XMP profiles for RAM were crucial steps to ensure optimal performance from my new machine.
Following the successful BIOS configuration, the next step involved installing an operating system. I chose to use Windows for its versatility and compatibility with a vast array of applications. The installation process was fairly straightforward, but I remained on high alert, ready to troubleshoot if any complications arose. Once the operating system was installed, my attention turned to the essential drivers required to unleash the full potential of my hardware. Installing graphics card drivers, chipset drivers, and network drivers was imperative to ensure seamless functionality.
The final stage of the initial setup was spent optimizing settings, ensuring that everything was functioning smoothly. I tweaked power options, updated software, and tested the performance of my newly assembled desktop. Seeing it all in action, I felt a gratifying sense of accomplishment. Using my custom machine—tailored to my specifications and built with care—was an incredibly fulfilling experience, signifying the success of my endeavor.